
Ingredients and Equipment Needed
For baking Rhodes frozen bread dough, you’ll need essential ingredients like bread flour, sugar, salt, yeast, and water. Required equipment includes a mixing bowl, measuring cups, an oven, a wire rack, and a skillet for thawing.
Essential Ingredients
For baking Rhodes frozen bread dough, essential ingredients include bread flour, sugar, salt, active yeast, and warm water. These components ensure proper dough rise and flavor development. Bread flour provides structure, while sugar feeds the yeast for fermentation. Salt enhances taste, and yeast is vital for the dough to rise. Always use fresh yeast for best results. These basics create a light, airy texture and golden-brown crust.
Required Equipment
To bake Rhodes frozen bread dough, you’ll need a large mixing bowl, measuring cups, and a wooden spoon or dough whisk. A skillet or pan is essential for thawing, while an oven is necessary for baking. A wire rack is recommended for cooling the bread evenly. Non-stick cooking spray or oil ensures the dough doesn’t stick during rising or baking. These tools help achieve the perfect texture and golden-brown finish.

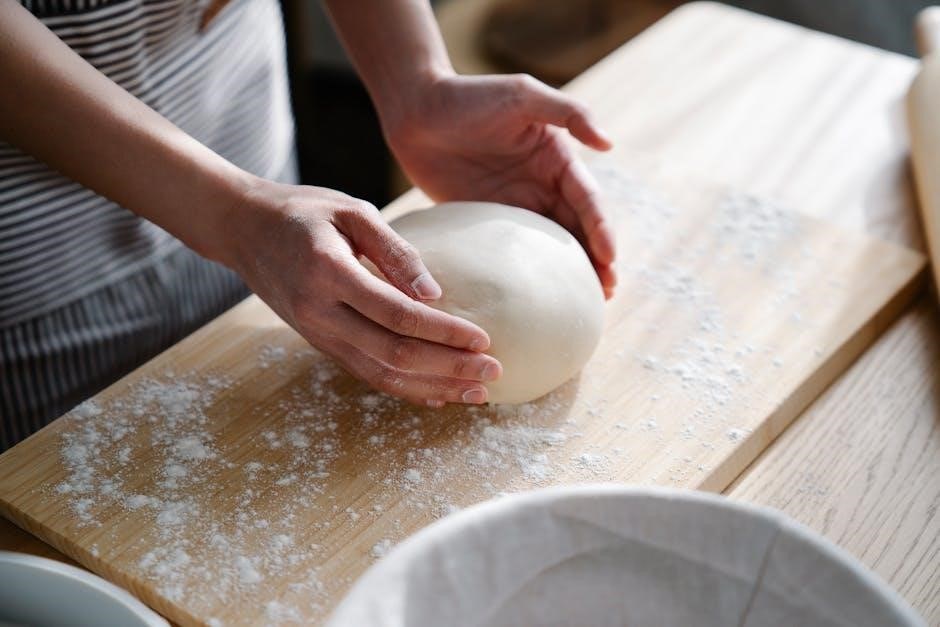
Thawing the Dough
Thaw Rhodes dough in the refrigerator overnight for slow, even thawing. Alternatively, thaw at room temperature covered in plastic wrap or use a speed thaw method with a damp cloth in a warm place. Always ensure the dough is fully thawed before rising to achieve optimal results.
Refrigerator Thawing
Place the frozen dough on a lightly oiled baking sheet or in a covered container. Refrigerate overnight, allowing 8-12 hours for thawing. Keep it covered to prevent drying out. Once thawed, the dough is ready for rising. This method ensures even thawing and maintains dough freshness for the best baking results. Always follow package instructions for specific thawing guidelines.
Room Temperature Thawing
Place the frozen dough on a lightly oiled baking sheet or in a covered container. Cover the dough to prevent drying and let it thaw at room temperature for about 2-4 hours, depending on the temperature. Keep it away from direct sunlight or heat sources to ensure even thawing. Once thawed, the dough is ready to rise. Always follow package instructions for specific thawing guidelines.
Speed Thawing Method
For faster thawing, place the frozen dough in a lightly oiled pan and cover it with plastic wrap or a damp cloth. Position the pan near a warm heat source, such as a radiator or preheated oven at 200°F. Turn off the oven and place the dough inside to thaw and rise simultaneously. This method reduces thawing time to about 1-2 hours, ensuring quick preparation for baking.

Rising the Dough

Place the dough in a warm, draft-free environment, ideally at 80-90°F. Allow the dough to rise until it has doubled in size for optimal results.
Optimal Rising Environment
For the best results, place the dough in a warm, draft-free area, such as near a preheating oven or in a cozy corner of your kitchen. Cover the dough with plastic wrap or a clean, damp towel to retain moisture and warmth. A temperature range of 80-90°F is ideal for fermentation. Avoid direct sunlight or cold drafts, as this can slow the rising process. Ensure the dough is in a lightly oiled bowl to prevent sticking.

Dough Rising Time
The dough typically requires 4-6 hours to rise at room temperature, depending on environmental conditions. If using a warm place, it may rise faster, taking about 2-3 hours. Ensure the dough doubles in size before proceeding to bake. Keep an eye on it, as over-proofing can lead to a dense texture. Proper rising ensures a light and airy texture in the final baked bread.

Baking Instructions
Preheat your oven to 350°F. Place the dough on a baking sheet, bake for 15-25 minutes until golden brown, and cool on a wire rack.
Oven Preparation
Preheat your oven to 350°F (175°C) before baking. Lightly grease a baking sheet or line it with parchment paper for even dough placement. Ensure the oven is clean and preheated properly to avoid uneven baking. Place the dough on the prepared baking sheet, leaving enough space between pieces for expansion. This setup ensures a golden-brown finish and consistent baking results every time.
Baking Time and Temperature
Bake Rhodes frozen bread dough at 350°F (175°C) for 15-20 minutes for rolls and 20-25 minutes for loaves. Adjust time based on dough size and oven performance. A golden-brown crust indicates doneness. Keep an eye during the last few minutes to prevent over-browning. Proper temperature and timing ensure a perfectly baked crust and a soft interior. Always refer to specific product instructions for accurate results.
Using a Convection Oven
For Rhodes frozen bread dough, preheat your convection oven to 325°F (160°C). Bake for 15-20 minutes, reducing both time and temperature compared to a standard oven. This method ensures even browning and a crispy crust. Keep an eye on the dough to avoid overcooking, as convection ovens cook faster. Adjust time by about 25% less than traditional baking instructions for optimal results.
Proper cooling prevents sogginess and ensures crispiness. Place bread on a wire rack immediately after baking to allow air circulation and even cooling. After baking, let the bread cool on a wire rack to prevent sogginess. Avoid wrapping it in plastic wrap or placing it in a sealed container immediately. Allow air to circulate around the bread for at least 15-20 minutes. This step ensures the crust remains crispy while the interior stays soft. Proper cooling also helps the bread set its structure and makes it easier to slice evenly. Proper cooling is crucial for maintaining bread quality. It prevents moisture buildup, which can lead to sogginess or mold. Cooling allows the bread’s structure to set, ensuring a fresh texture and better slicing. Improper cooling can result in a dense or soggy loaf, diminishing the baking effort. Always cool bread on a wire rack to promote airflow and preserve its integrity. This step is essential for achieving professional results. Rhodes frozen bread dough is a convenient and safe option for homemade bread. It contains essential nutrients like carbohydrates, fiber, and protein, supporting a balanced diet. Always follow proper thawing and baking instructions to ensure food safety and enjoy a nutritious, freshly baked loaf. Rhodes frozen bread dough provides approximately 80-100 calories per slice, with 2-3g of protein, 1-2g of fat, and 15-20g of carbohydrates. It is low in cholesterol and contains minimal fiber. Fortified versions may include iron, B vitamins, and folic acid. Always check the packaging for specific nutritional details, as variations exist based on the product. Store Rhodes frozen bread dough in the freezer at 0°F (-18°C) or below to maintain freshness. Once thawed, refrigerate at 40°F (4°C) and use within 3-5 days. Freeze baked bread at room temperature for up to 3 months. Avoid refreezing thawed dough for optimal quality. Proper storage ensures the dough remains fresh and ready for baking when needed. Always follow packaging instructions for best results. Common issues include dough not rising due to expired yeast or incorrect temperatures. Sticky dough can result from over-flouring; adjust as needed for smooth texture. If the dough isn’t rising, check the yeast expiration date and ensure it’s active. Verify the rising environment isn’t too cold or drafty. Proper thawing and warm temperatures are crucial. Avoid overmixing, as it can kill the yeast. Ensure the dough is placed in a lightly oiled bowl, covered with plastic wrap or a damp cloth, and kept in a warm, draft-free space. If the dough is too sticky, lightly dust your hands and surface with bread flour. Gently knead until it becomes smooth and manageable. Avoid over-flouring, as it can make the bread dense. Use a dough scraper or spatula to handle sticky portions. Keep the dough lightly oiled to prevent sticking and ensure proper handling during shaping and baking. Enhance flavor by brushing dough with butter or olive oil before baking. For variation, try adding herbs, cheese, or garlic to the dough for unique taste. Experiment with different baking methods like convection ovens or pizza stones for crispy crusts. For a richer taste, brush the dough with melted butter or olive oil before baking. Sprinkle herbs like rosemary or garlic powder for aromatic flavor. Adding cheese, sesame seeds, or dried herbs can create a unique crust. For a sweeter option, lightly glaze with honey or maple syrup during the last 5 minutes of baking. These simple additions elevate the bread’s flavor profile effortlessly.
For a crispy crust, bake in a preheated oven at 350°F for 15-20 minutes. Using a convection oven at 325°F can reduce baking time by 5 minutes. Alternatively, air fryers can be used at 300°F for 10-12 minutes, yielding a golden-brown finish. Experiment with a skillet on the stovetop over medium heat for a rustic texture. Each method offers a unique result while maintaining the bread’s delicious flavor.
Cooling the Bread
Proper Cooling Techniques
Importance of Cooling
Nutrition and Safety
Nutritional Information
Storage Tips

Troubleshooting Common Issues
Dough Not Rising
Dough Too Sticky

Additional Tips and Variations
Enhancing Flavor
Using Different Baking Methods