The Magic Mill Dehydrator Manual is your comprehensive guide to mastering food dehydration. Designed for both beginners and experienced users, it covers setup, operation, and maintenance. Whether you’re preserving fruits, vegetables, or making jerky, this manual ensures optimal results. Discover how to unlock your dehydrator’s full potential and create healthy, delicious snacks effortlessly.
1.1 Overview of the Magic Mill Dehydrator
The Magic Mill Dehydrator is a versatile kitchen appliance designed for efficient food preservation. It features adjustable temperature controls, an automatic fan, and multiple trays for even drying. Ideal for fruits, vegetables, and meats, it ensures healthy snacks without additives. With its user-friendly interface and robust design, this dehydrator simplifies the process of creating delicious, shelf-stable foods at home, making it a must-have for health-conscious cooks and outdoor enthusiasts.
1.2 Importance of Reading the Manual
Reading the Magic Mill Dehydrator manual is crucial for safe and effective operation. It provides essential safety guidelines, detailed setup instructions, and troubleshooting tips. Understanding the manual ensures you utilize all features, such as temperature controls and timers, correctly. It also offers maintenance advice to prolong the appliance’s life and tips for achieving optimal dehydration results. By following the manual, you can maximize performance, avoid potential hazards, and enjoy consistent, high-quality outcomes every time.

Safety Guidelines and Precautions
Always follow safety guidelines to ensure safe operation. Avoid wet hands, check for damage, and keep children away. Use the dehydrator as intended and maintain it properly.
2.1 General Safety Tips
Always read the manual before use to ensure safe operation. Place the dehydrator on a stable, heat-resistant surface. Avoid touching hot surfaces and never use wet hands. Check for damage before each use. Keep children and pets away while operating. Ensure proper ventilation in the room. Do not leave the dehydrator unattended during operation. Avoid using it near water or flammable materials. Unplug when not in use to prevent accidents.
2.2 Avoiding Common Hazards
To ensure safe operation, avoid common hazards like using the dehydrator near water or flammable materials. Never operate it with wet hands or near children. Regularly inspect for damage and avoid overheating by ensuring proper ventilation. Keep the dehydrator on a stable, heat-resistant surface. Prevent accidents by cleaning spills immediately and avoiding contact with hot parts. Always unplug the unit when not in use to minimize risks.

Unboxing and Initial Setup
Carefully unpack your Magic Mill Dehydrator, ensuring all components are included. Inspect for damage, wash trays, and place the unit on a stable surface. Plug it in and perform a test run to ensure proper function before first use.
3.1 Unpacking the Dehydrator
Excitement begins with unboxing! Carefully remove all packaging materials and inspect the unit for any damage. Ensure all components, including trays, power cord, and manual, are included. Gently lift the dehydrator and place it on a stable surface. Check for any loose parts or scratches. If everything is in order, you’re ready to proceed to assembly and setup. Refer to the manual for specific unpacking instructions and safety tips.
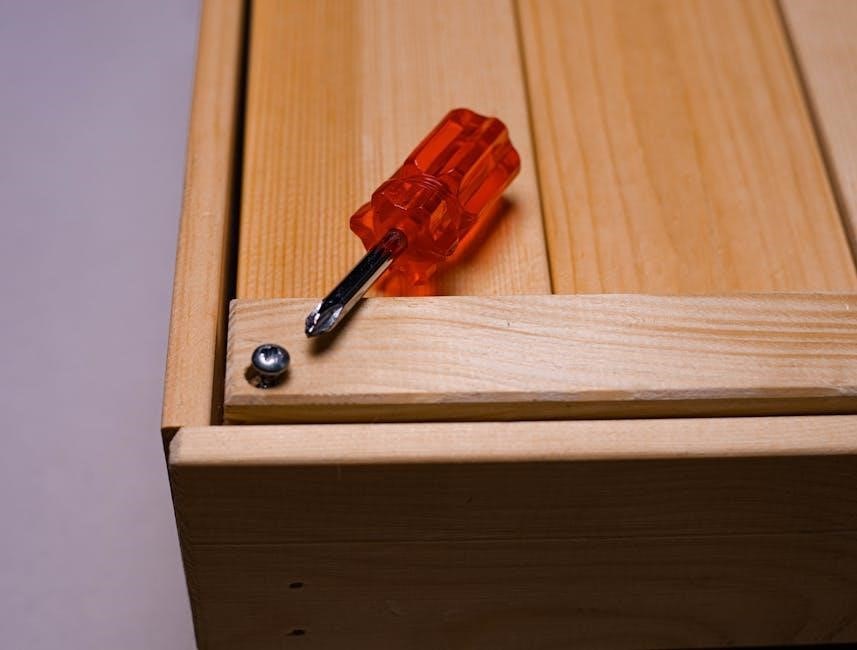
3.2 Assembling the Unit
Begin by carefully unpacking all components and identifying each part. Attach the trays to the base by aligning the clips and securing them firmly. Ensure the trays are evenly spaced for proper airflow. Next, connect any additional accessories like the fruit roll tray or jerky rack. Double-check that all parts are aligned correctly and securely fitted. Refer to the manual for specific assembly instructions, especially for optional attachments or complex components.
3.3 Placing the Dehydrator in a Suitable Location
Position the Magic Mill Dehydrator in a well-ventilated area to ensure proper airflow and even drying. Avoid placing it near direct sunlight, moisture, or heat sources. Choose a stable, flat surface to prevent vibration. Keep the unit away from children and pets for safety. Ensure at least 4 inches of clearance around the dehydrator for optimal performance. Regularly clean the surrounding area to prevent dust buildup and maintain efficiency.
Understanding the Components and Features
The Magic Mill Dehydrator features adjustable temperature controls, a digital timer, and an automatic fan for consistent airflow. These components ensure efficient and even food dehydration.
4.1 Exterior and Interior Parts
The Magic Mill Dehydrator features a durable exterior with a control panel, fan, and transparent door. Inside, it includes multiple trays, a heating element, and an interior lining for easy cleaning. These components ensure efficient airflow and even drying of food. The design promotes accessibility and ease of use, making the dehydration process straightforward and manageable for all users.
4.2 Adjustable Temperature and Timer Controls
The Magic Mill Dehydrator features adjustable temperature controls (95-158°F) and a timer (up to 24 hours), allowing precise customization for different foods. The digital display ensures easy monitoring, and the automatic shut-off adds convenience. This flexibility enables users to achieve optimal drying for fruits, vegetables, and meats, ensuring consistent results every time. The intuitive controls make it easy to set and adjust settings for perfect dehydration outcomes.
4.3 Automatic Fan and Airflow System
The Magic Mill Dehydrator features an automatic fan and advanced airflow system, ensuring even drying without the need to rotate shelves. The fan circulates warm air evenly across all trays, promoting consistent dehydration. This system minimizes hot spots and reduces drying time, making the process efficient and hassle-free. The airflow design ensures that foods dry uniformly, maintaining their flavor and texture for optimal results every time.

Operating the Dehydrator
Operating the Magic Mill Dehydrator is straightforward. Simply place food on trays, set the temperature and timer, and let the automatic fan handle even drying for perfect results.
5.1 Basic Operation Steps
Start by placing food evenly on the trays, ensuring proper airflow. Set the desired temperature between 95-158°F and timer up to 24 hours. Press Start to begin dehydration. The automatic fan circulates warm air for even drying. Once the cycle completes, the dehydrator shuts off automatically. Remove dried food and store it immediately for best results. Always follow safety guidelines and cleaning procedures for optimal performance and longevity of your Magic Mill Dehydrator.
5.2 Advanced Features for Even Drying
The Magic Mill Dehydrator features an automatic fan and superior airflow system, ensuring even drying without rotating trays. Adjustable temperature control allows precise settings for various foods, while the digital timer provides accuracy. These advanced features promote consistent results, preventing over-drying or under-drying. The unit’s design maximizes efficiency, making it ideal for large batches and diverse dehydration needs, ensuring perfectly dried foods every time with minimal effort and monitoring.

Temperature and Timer Controls
The Magic Mill Dehydrator offers adjustable temperature settings (95-158°F) and a timer (up to 24 hours in half-hour increments). This ensures precise control for optimal drying, with automatic shut-off for convenience and safety.
6.1 Setting the Optimal Temperature
Setting the optimal temperature is crucial for achieving perfectly dried foods. The Magic Mill Dehydrator allows you to adjust the temperature between 95°F and 158°F, ensuring flexibility for various food types. Lower temperatures are ideal for delicate fruits and herbs, while higher settings are better for meats and thicker vegetables. Always refer to the manual for specific temperature recommendations to preserve nutrients and achieve desired textures;
6.2 Using the Timer for Perfect Results
The Magic Mill Dehydrator’s timer allows you to set precise drying times, ensuring your food is perfectly dehydrated. With adjustable intervals up to 24 hours, you can customize the process for different foods. The timer’s accuracy prevents over-drying, preserving nutrients and flavors. Once the cycle completes, the automatic shut-off feature kicks in, allowing you to achieve consistent results without constant monitoring.

Cleaning and Maintenance
Regular cleaning ensures optimal performance and longevity. Detach trays for easy washing, wipe surfaces with a damp cloth, and sanitize all parts to maintain hygiene and efficiency.
7.1 Regular Cleaning Procedures
Regular cleaning is essential for maintaining your Magic Mill Dehydrator’s performance and hygiene. Start by unplugging the unit and allowing it to cool completely. Remove all trays and wash them with mild soap and warm water. Use a soft cloth to wipe down the exterior and interior, paying attention to any areas with visible residue. Avoid using abrasive cleaners or scrubbers, as they may damage the surfaces. For tougher stains, mix a solution of equal parts water and white vinegar and apply it to the affected areas before wiping clean. After cleaning, ensure all parts are thoroughly dry to prevent moisture buildup. Regular maintenance will extend the life of your dehydrator and ensure consistent results.
7.2 Deep Cleaning and Sanitizing
For deep cleaning, disassemble the dehydrator, including trays, shelves, and drip pans. Soak these parts in warm, soapy water for 30 minutes. Scrub with a soft brush to remove stubborn residue. Rinse thoroughly and dry. Sanitize by wiping all surfaces with a 50/50 water and white vinegar solution. Allow the solution to sit for 10 minutes before rinsing. Regular deep cleaning ensures optimal hygiene and prevents bacterial growth, keeping your dehydrator in prime condition.

Tips for Optimal Performance
For optimal performance, ensure even food distribution, monitor dehydration progress, and utilize the automatic fan for consistent results. Proper preparation and timely checks enhance efficiency.
8.1 Preparing Food for Dehydration
Preparing food for dehydration is crucial for optimal results. Slice fruits and vegetables evenly to ensure consistent drying. Pat dry excess moisture to prevent uneven dehydration. Pre-treat foods like fruits with lemon juice to retain color and texture. Blanch vegetables briefly to preserve nutrients and texture. Avoid overcrowding trays, as this hinders airflow. Use the Magic Mill Dehydrator’s automatic fan and even airflow to achieve perfectly dried results every time.
8.2 Monitoring the Dehydration Process
Monitor the dehydration process by checking the temperature and timer settings regularly. Ensure even drying by rotating trays if necessary. Check food dryness by breaking or bending pieces. Optimal results occur when food is dry but not brittle. Remove items as they finish drying to prevent over-dehydration. Use the automatic shut-off feature for convenience. Proper monitoring ensures perfectly preserved snacks every time with your Magic Mill Dehydrator.

Troubleshooting Common Issues
Check power connections if the dehydrator won’t start. Ensure proper airflow for even drying. Consult the manual for solutions to overheating or uneven results. Contact support if issues persist.
9.1 Identifying and Solving Problems
Start by checking the power cord and outlet if the dehydrator doesn’t turn on. For uneven drying, ensure proper airflow by spacing trays evenly. If noise occurs, inspect for blockages. Address overheating by reducing temperature settings. Refer to the manual for specific error solutions. Clean the fan and vents regularly to maintain performance. If issues persist, contact Magic Mill customer support for assistance or replacement parts.
9.2 When to Contact Customer Support
Contact Magic Mill customer support if issues persist after troubleshooting. Reach out for complex problems like persistent noise, malfunctioning controls, or unclear error messages. Request assistance for damaged or missing parts, or if repairs are needed. Support is also available for warranty claims or product registration. Ensure to have your model number ready for efficient service. Their expertise will help resolve issues and maintain your dehydrator’s performance and longevity.

Recipes and Creative Uses
Discover delicious recipes for dried fruits, vegetables, and jerky. Create healthy snacks, fruit leather, and more. Explore creative ideas for preserving flavors and nutrients effortlessly with your Magic Mill dehydrator.
10;1 Fruit and Vegetable Recipes
Discover how to create delicious dried fruits and vegetables using your Magic Mill dehydrator. From vibrant fruit leather to crispy veggie chips, preserve natural flavors and nutrients without additives. Learn tips for optimal dehydration times and temperatures to ensure perfect results. The manual provides guidance on preparing slices, preventing stickiness, and enhancing flavors, making healthy snacks and meal prep a breeze. Explore creative ways to enjoy your harvest year-round with ease and precision.
10.2 Making Fruit Leather and Jerky
Create delicious fruit leather and jerky with your Magic Mill dehydrator. Follow simple steps to puree fruits for leather or marinate meats for jerky. The dehydrator’s even drying and automatic shut-off ensure perfect results. Avoid preservatives by using natural ingredients, resulting in healthy, flavorful snacks. Learn optimal temperature and timing settings for chewy or crispy textures. Make homemade treats that are both nutritious and customizable to your taste preferences.
Thank you for exploring the Magic Mill Dehydrator Manual! With these insights, you’re ready to master dehydration. Experiment with new recipes, enjoy healthy snacks, and preserve food effortlessly. Happy dehydration!
11.1 Summary of Key Points
The Magic Mill Dehydrator Manual provides a detailed guide to understanding and using your appliance effectively. Key points include proper setup, safety precautions, and maintenance tips. It emphasizes optimal temperature and timer settings for consistent results. The manual also highlights the importance of food preparation and monitoring for best outcomes. By following these guidelines, users can enjoy healthy, delicious dehydration with ease and confidence. Happy cooking!
11.2 Encouragement for Further Exploration
With the Magic Mill Dehydrator Manual as your guide, the possibilities for creative dehydration are endless. Experiment with new recipes, from vibrant fruit leathers to savory jerky, and explore the world of preserved foods. Keep discovering how dehydration can enhance your culinary skills and provide healthy, delicious snacks for years to come. Embrace the journey and enjoy the satisfaction of creating nourishing treats with your Magic Mill Dehydrator.