The NOCO GB20 manual is a comprehensive guide to understanding and utilizing your portable lithium-ion jump starter. It covers key features, safety precautions, and proper usage to ensure safe and effective operation of the device. Reading this manual is essential for maximizing the product’s potential and ensuring user safety.
1.1 Overview of the NOCO Boost Sport GB20
The NOCO Boost Sport GB20 is a portable lithium-ion battery jump starter designed for vehicles, boats, and motorcycles. With 500 amps of power, it offers reliable jump-starting capabilities and includes a USB charging port for added convenience. Its compact design and safety features make it an essential tool for emergencies, ensuring efficient and secure battery boosting on the go.
1.2 Importance of Reading the Manual
Reading the NOCO GB20 manual is crucial for safe and effective use. It provides essential information on proper connections, usage guidelines, and safety precautions. Understanding the device’s features and limitations ensures optimal performance and prevents potential hazards, making it a vital step before operating the jump starter for the first time or in emergencies.
Key Features and Specifications
The NOCO GB20 features a 500-amp portable lithium-ion battery, USB charging port with 2;1 Amps, and manual override capability for safe and efficient jump-starting experiences.
2.1 500-Amp Portable Lithium-Ion Battery Jump Starter
The NOCO GB20 boasts a powerful 500-amp lithium-ion battery, designed for portable jump-starting of cars, boats, and motorcycles. Its compact design and high-capacity performance make it ideal for emergencies, delivering reliable starts even in challenging conditions. Safety features include overcharge protection and thermal management, ensuring safe and efficient operation for various vehicle types.
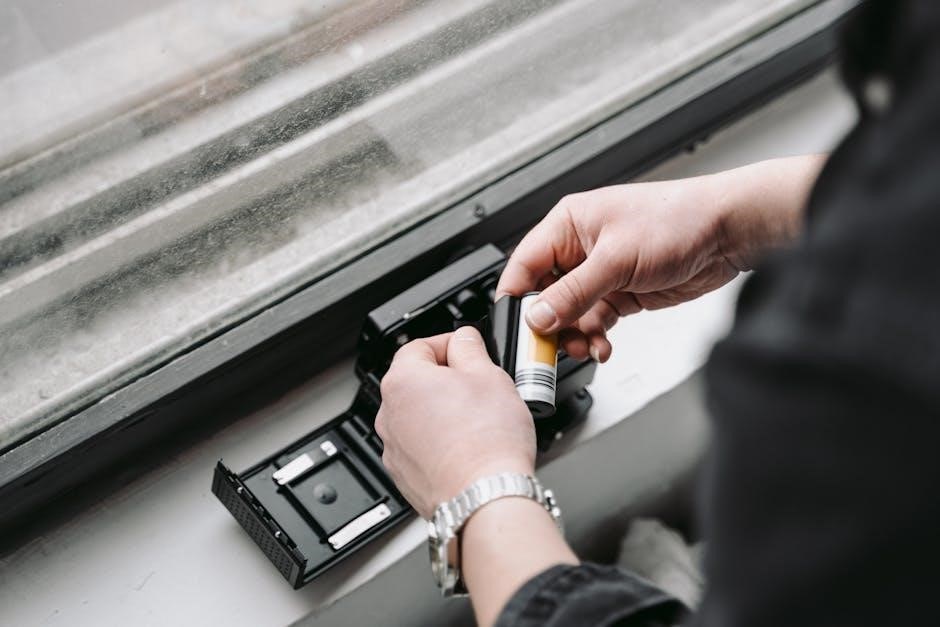
2.2 USB Charging Port (2.1 Amps)
The NOCO GB20 features a convenient USB charging port with a 2.1 Amp rating, ensuring safe and efficient charging of the internal lithium-ion battery. This port is designed to maintain optimal charging speeds while adhering to federal safety guidelines, providing users with a reliable way to keep their device powered and ready for emergencies.
2.3 Manual Override Feature
The Manual Override feature on the NOCO GB20 allows users to bypass automatic safety protocols when necessary. This feature is particularly useful for jump-starting deeply discharged batteries, ensuring the device can still function effectively in challenging situations while maintaining safety standards. Proper use requires careful connection of clamps to correct terminals, as outlined in the manual, to avoid any potential risks and ensure reliable operation. Always refer to the guide before activating this feature to prevent accidents and damage to the device or vehicle.
Safety Precautions
Always ensure correct battery voltage and polarity connections to avoid damage or injury. The GB20 can jump-start batteries as low as 2 volts, but proper handling is crucial to prevent short circuits and ensure safe operation. Follow all guidelines carefully to maintain user and device safety. Always prioritize caution when working with electrical systems. Proper usage is key to avoiding hazards. Never overlook safety protocols. Ensure the device is used only for its intended purposes. Regularly inspect the clamps and cables for damage. Keep the device away from children and flammable materials. Safety should always be your first consideration. Adhere to all warnings and instructions provided in the manual. Failure to comply may result in serious injury or equipment damage. Stay informed and vigilant during every use. Battery maintenance and care are equally important for optimal performance and longevity. Take all necessary precautions to ensure a safe and effective jump-starting experience. Always be mindful of your surroundings when operating the GB20. Never attempt to modify or tamper with the device. Use only approved accessories to maintain safety and functionality. Familiarize yourself with emergency procedures in case of an accident. Keep emergency contact information handy. Ensure the vehicle is in park or neutral gear during jump-starting. Avoid any distractions while operating the device. Proper storage and handling are essential for preserving the device’s performance. Regularly clean and maintain the GB20 to prevent malfunctions. Stay updated with any safety recalls or firmware updates. Your safety and the device’s reliability depend on strict adherence to these guidelines. Always double-check connections before activating the GB20. Never leave the device unattended while in use. Be aware of your environment to prevent accidents. Safety is a shared responsibility between the user and the manufacturer. By following these precautions, you can ensure a safe and effective experience with the NOCO GB20. Always remember, safety first. The GB20 is designed to be safe when used correctly, but misuse can lead to serious consequences. Stay informed, stay safe, and enjoy the reliability of your NOCO GB20.
3.1 Battery Voltage and Chemistry Requirements
The NOCO GB20 is designed for 12-volt lead-acid batteries, with a minimum starting voltage of 2 volts. Always determine the battery’s voltage and chemistry using the owner’s manual before use. Incorrect voltage or chemistry mismatch can cause damage or safety risks. Ensure compatibility to avoid malfunctions and potential hazards, and always follow the guidelines for safe operation.
3.2 Correct Polarity Connections
Correct polarity connections are crucial for safe and effective use of the NOCO GB20. Always connect the positive (red) clamp to the positive battery terminal and the negative (black) clamp to a metal surface or negative terminal. Reverse connections can cause damage or safety hazards. Ensure proper polarity to avoid risks and maintain the device’s functionality. Use the HD X Connect for secure, correct connections.
3.4 Low Voltage Batteries (Down to 2 Volts)
The NOCO GB20 is designed to jump-start batteries with voltages as low as 2 volts. For batteries below this threshold, the device may not function properly. Ensure the battery voltage meets the minimum requirement before attempting a jump-start. This feature enhances versatility, allowing the GB20 to work with deeply discharged batteries safely and effectively.

Using the Manual Override Feature
The manual override feature provides advanced control for jump-starting, ensuring safe and effective use with proper connections and strict adherence to safety guidelines provided.
4.1 When to Use Manual Override
The manual override feature is designed for use with deeply discharged batteries or when the automatic function fails to detect a battery. Use it for low-voltage situations (down to 2 volts) to force a jump start. Ensure correct polarity connections and HD X Connect usage before activating manual override to avoid damage or safety hazards.
4.2 Step-by-Step Guide to Manual Override
Connect the clamps to the battery terminals, ensuring correct polarity. 2. Press and hold the boost button for 3 seconds to enable manual override. 3. The LED will flash, indicating manual mode activation. 4. Start the vehicle and remove the clamps once operational. Always monitor connections to avoid short circuits or damage.
Jump-Starting a Vehicle
Connect the clamps to the battery terminals, ensuring correct polarity. Start the vehicle and remove the clamps once operational. Always monitor connections to avoid damage.
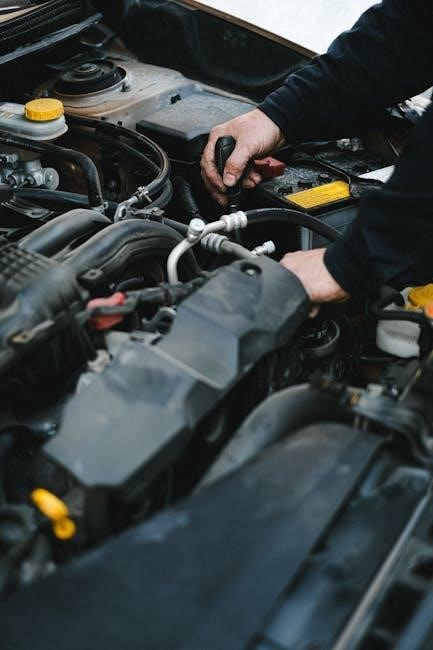
5.1 Connecting the Battery Clamps
Connect the positive (red) clamp to the positive terminal and the negative (black) clamp to the negative terminal or a grounded metal surface. Ensure secure connections to avoid sparks. Always confirm proper polarity to prevent damage to the vehicle or the GB20. Double-check all connections before starting the jump-start process to ensure safety and effectiveness.
5.2 Ensuring Proper HD X Connect Usage
Ensure the HD X Connect is securely plugged into the GB20 and properly attached to the vehicle’s battery terminals. Firmly secure the clamps to avoid loose connections, which can cause sparks or ineffective charging. Always check for damage before use and verify correct polarity by matching clamp colors to terminal types. Store the HD X Connect safely after use to prevent damage.

Troubleshooting Common Issues
Identify and resolve issues like the device not turning on or charging problems. Check connections, ensure proper polarity, and refer to the manual for solutions. Regular maintenance and correct usage can prevent many issues, ensuring safe and effective operation of the GB20 jump starter.
6.1 Device Not Turning On
If the NOCO GB20 doesn’t turn on, ensure it’s fully charged using the provided USB cable. Check the power button functionality and verify all connections are secure. If issues persist, refer to the troubleshooting section in the manual for detailed diagnostic steps and solutions to restore functionality.
6.2 Charging Issues
If charging issues occur, ensure the USB port is clean and free of debris. Verify the charging cable is undamaged and connected to a functioning power source. Allow the device to charge for at least 30 minutes. If problems persist, check for deep discharge or faulty internal circuits, and refer to the manual for reset procedures or contact customer support.

Maintenance and Storage Tips
Regularly clean the GB20 with a soft cloth and avoid moisture. Store it in a cool, dry place, away from direct sunlight and extreme temperatures. Check the battery level before long-term storage for optimal performance and safety.
7.1 Cleaning the Device
Use a soft, dry cloth to wipe down the GB20, avoiding moisture and harsh chemicals. Regular cleaning prevents dirt buildup and ensures optimal performance. For stubborn stains, lightly dampen the cloth but avoid liquids entering ports or internal components. Allow the device to air dry completely before storing or using it again.
7.2 Proper Storage Conditions
Store the GB20 in a cool, dry place away from direct sunlight and moisture. Avoid extreme temperatures and humidity. Keep the device in a protective case to prevent damage. Ensure the battery level is between 20% and 80% for long-term storage. Charging monthly is recommended to maintain battery health and readiness for use.

Customer Reviews and Testimonials
Users praise the GB20 for its reliability and ease of use. Many highlight its effectiveness in jump-starting vehicles and appreciate the clear, detailed manual provided.
8.1 User Experiences with the GB20
Many users have shared positive experiences with the GB20, highlighting its reliability and ease of use. Customers often mention its effectiveness in jump-starting vehicles, even in extreme conditions. Several reviews emphasize how the manual’s clarity helped them understand and utilize the device’s features, such as the manual override function, to their fullest potential. Users also appreciate its compact design and versatility for various applications.
8.2 Feedback on Manual Clarity
Users have praised the NOCO GB20 manual for its clear and well-structured instructions. Many appreciate the step-by-step guides and troubleshooting sections, which simplify complex processes. The manual’s clarity ensures even non-technical users can understand and utilize features like manual override effectively. Overall, positive feedback highlights the manual’s effectiveness in making the device user-friendly and accessible for all skill levels.

Technical Details and Compliance
The NOCO GB20 adheres to federal safety guidelines and holds necessary safety certifications. It is designed to meet industry standards for performance and reliability.
9.1 Federal Commission Guidelines
The NOCO GB20 complies with federal safety regulations, ensuring safe operation. It meets guidelines for portable lithium-ion devices, including proper charging and discharge rates. Compliance with these standards guarantees user safety and product reliability, aligning with industry norms for battery-powered equipment. Adherence to federal guidelines also ensures environmental and safety certifications are maintained.
9.2 Warranty and Safety Certifications
The NOCO GB20 is backed by a limited warranty covering manufacturing defects for a specified period. It meets rigorous safety standards, ensuring reliable performance. These certifications and warranty provide users with confidence in the product’s quality and safety, adhering to industry regulations and enhancing overall customer satisfaction.
The NOCO GB20 manual provides a comprehensive guide to safely and effectively using your portable jump starter. Always follow safety guidelines for optimal performance and reliability.
10.1 Final Thoughts on the NOCO GB20 Manual
The NOCO GB20 manual is a thorough guide, ensuring safe and effective use of the portable jump starter. It emphasizes proper connections, safety precautions, and maintenance tips. By following the manual, users can maximize the device’s performance and reliability. Always prioritize safety and adhere to the guidelines for optimal results with your GB20.
10.2 Encouragement to Follow Safety Guidelines
Adhering to safety guidelines is crucial for optimal performance and longevity of the NOCO GB20. Always ensure correct polarity connections and verify battery voltage before use. Failure to follow instructions may result in damage or safety risks. By prioritizing safety, you ensure reliable operation and protect both the device and your vehicle.